
Do you spend days or weeks setting up your development environment just the way you like it when you get a new computer? Is your home directory a mess of dotfiles and metadata that you’re reluctant to clean up just in case they do something useful? Do you avoid trying new versions of software because of the effort to roll back software and settings if the new version doesn’t work?
Take control over your local development environment with containerization and Dev-Env-as-Code!
Background
I don’t want to start from scratch and recreate all of this from memory
My development environment consists of many different pieces of software. I have compilers, utilities, runtime environments, test tools and an IDE. I have dependency, build and packaging tools. I have preferred settings, fonts and styling for my terminal.
The software comes from many different sources. Some I install from Ubuntu’s APT repositories. Some are installed by cloning code or downloading artifacts from GitHub. Others are downloaded from distribution networks and mirrors dedicated to a specific piece of software.
A significant part of all this software accepts user settings and preferences. These are stored in different files across my home directory. Over time while using the software my preferred settings have evolved to suit my taste and I have them set up just the way I like it.
If my computer is lost or broken beyond repair I don’t want to start from scratch and recreate all of this from memory. If I get a new computer I don’t want to painstakingly copy files between the two computers until the environments match.
If I try a new version of my IDE and decide that it isn’t working for me yet, the IDE has sometimes migrated my settings to a different format which is incompatible with the old version I was running. Having to remember to backup the IDE’s settings before upgrading is something I want to avoid. Sooner or later, I’ll forget and have to spend extra time fixing it.
For datacenters and production environments tools such as Ansible and Terraform have popularized the
Infrastructure-as-Code concept and given us the ability to version control the definition of our infrastructure. We no
longer have server farms that have evolved over years with upgrades, fixes and re-configurations, each server unique in
its own way. With docker and containers we gained the ability to precisely define an image of a Linux system and version
control the human readable Dockerfile recipe for that image. Inspired by these concepts I’ve built myself a
Dev-Env-as-Code project that gives me precise and reproducible control over my development environment.
Windowing and inputs
I want windows, buttons, copy-and-paste, mouse and keyboard to just work
I can create a Dockerfile of course that contains all the software and settings I want, but it’s important that my
development environment integrates seamlessly with my native desktop environment. I want windows, buttons,
copy-and-paste, mouse and keyboard to just work as if it was running natively on my Ubuntu laptop.
Linux operating systems use X11 and/or Wayland for windowing, copy-and-paste and inputs. X11 is the old system and protocol. It works everywhere but has an architecture that is becoming outdated1. Wayland is intended as a modern replacement for X11 in most cases, but not all software supports Wayland yet. My Ubuntu host uses Wayland but also runs Xwayland which offers an X11 interface for backwards compatibility.
For applications to draw to the screen and receive input, they communicate over either the X11 protocol or the Wayland protocol on sockets offered by the X11 and Wayland services. These sockets can be local Unix domain sockets or network sockets. As long as applications know where the socket is, and have access to it, they can draw to the screen and receive input. This also applies to containerized processes. As long as processes inside the container can locate and use the socket they can look and feel just like native graphical applications.
For simplicity I’ve chosen to only make the X11 interface available to my containerized development environment. For me there’s no big benefits with Wayland at the moment. All the graphical software I use work fine with X11.
So, my Ubuntu host’s Xwayland process serves an X11 interface. That X11 interface is made available to my container’s
processes by allowing the container to share the host’s network (--net=host) and letting it know which X11 display to
use (-e DISPLAY). I also need to provide the Xauthority credentials to allow the container’s processes to authenticate
to the X11 service (-v $XAUTHORITY:/home/$USER/.Xauthority). Here’s a simplified example:
My Dockerfile:
FROM ubuntu:jammy

RUN apt update && apt upgrade -y && \
  apt install -y \
  x11-apps

CMD ["xeyes"]
Building the image:
podman build -t example-xeyes-image .
Running the container:
podman run \
  -e DISPLAY \
  --net=host \
  -v $XAUTHORITY:/home/$USER/.Xauthority \
  example-xeyes-image
The container will open a window with two eyes that follow the mouse cursor around the screen.
Making it useful
a pair of cursor tracking eyes are not very useful on their own
What you see above are all the building blocks needed for Dev-Env-as-Code. But a pair of cursor tracking eyes are not
very useful on their own, of course, so the first process I run in my devenv container is a gnome-terminal window
from where I launch all other software I want during my coding session. Including additional gnome-terminal windows as
needed. My Dockerfile is full of software that I use as a developer, and I constantly add to it as I discover new
tools that I need or want. I also add or update application-specific configurations on a frequent basis to suit my
preferences.
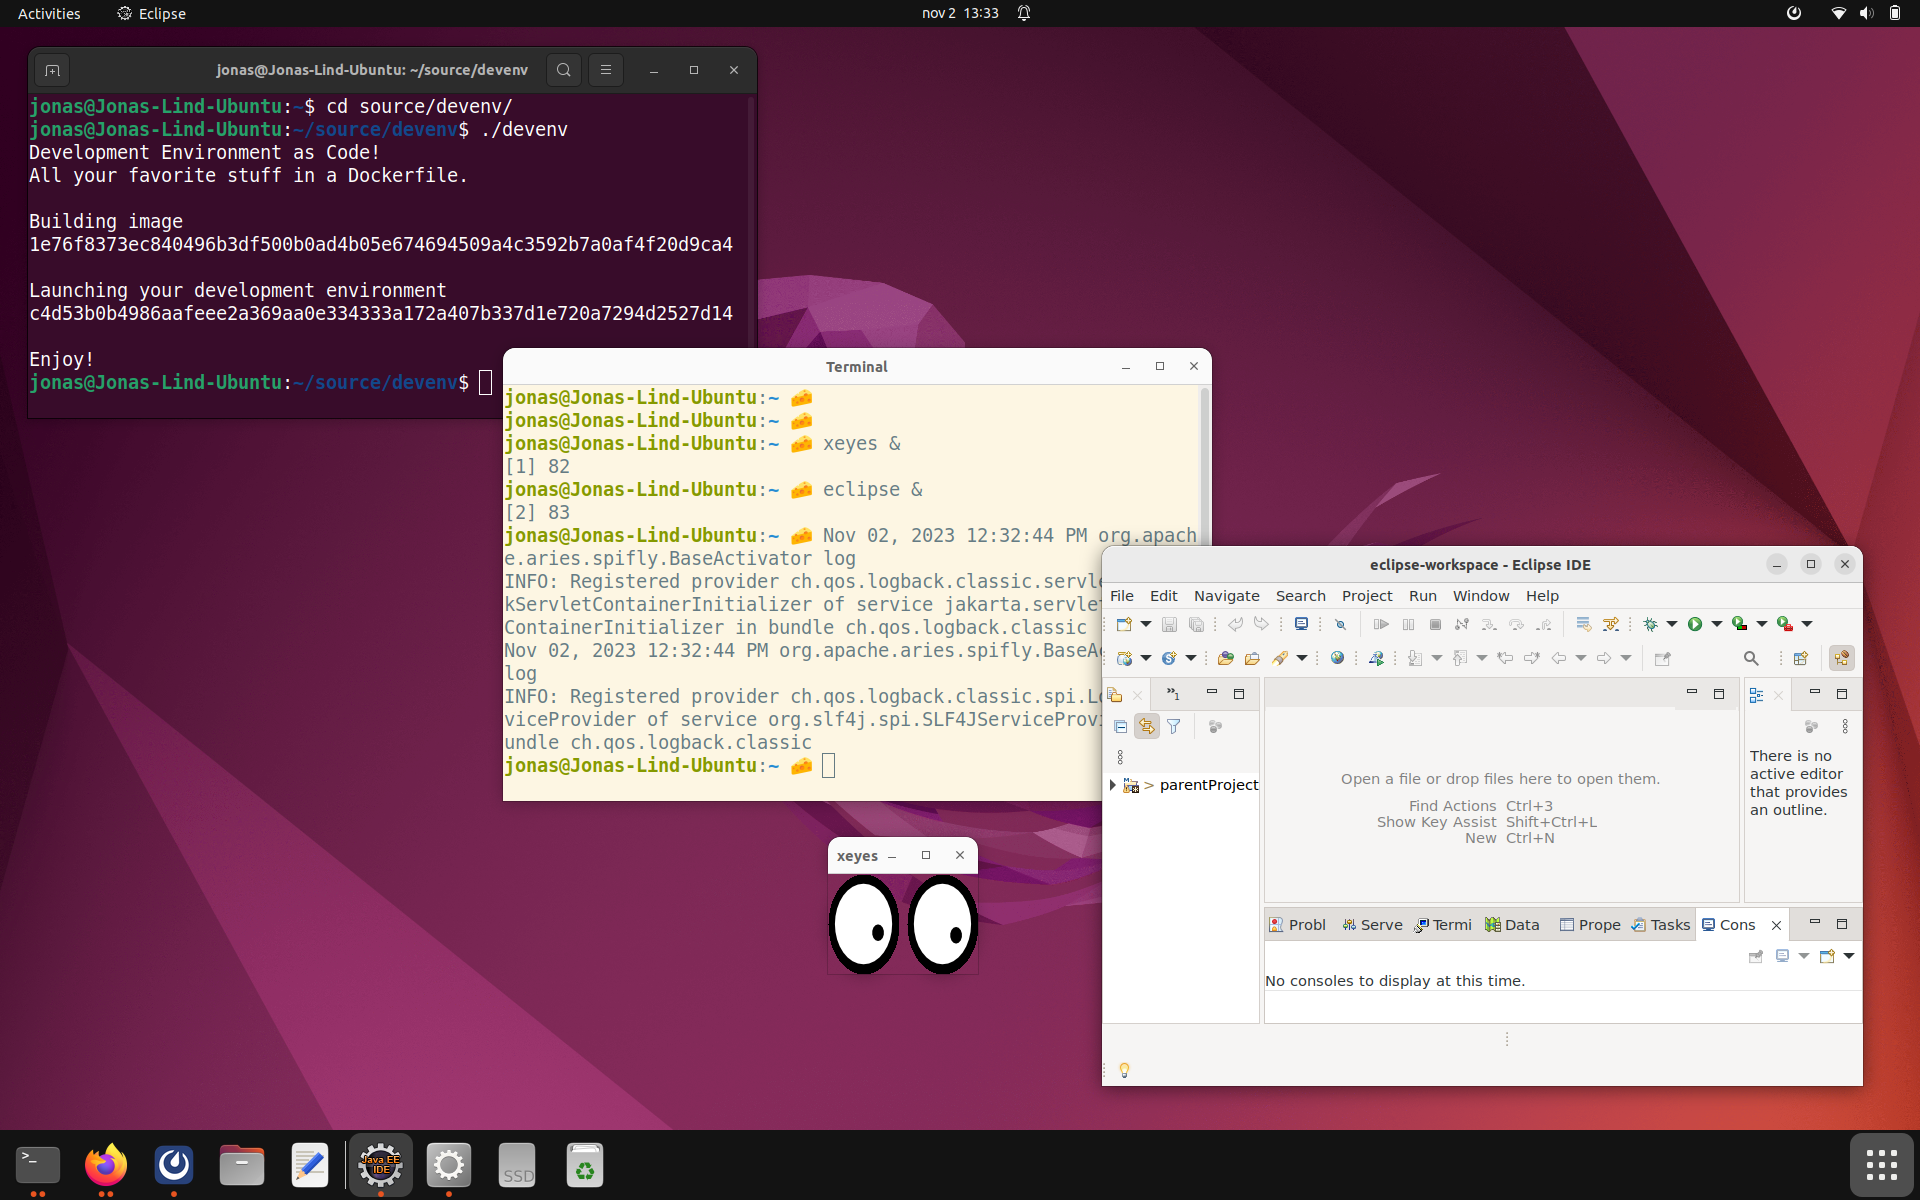
I’ve written a helper script (named devenv because of lack of imagination) that builds and launches the development
environment container. In the screenshot below the black terminal window runs on the host. In that terminal, the
development environment is started. That in turn opens the cream terminal window which lives inside the container. From
the cream terminal I start xeyes and eclipse.
I mount ~/Downloads into the container so that files I download on the host are available in the
container and vice versa. The ~./ssh directory and the /run/user/$uid/keyring/ssh socket are mounted so that I can
authenticate towards network services using the same SSH Public Keys on the host and in the devenv container. The
/run/user/$uid/podman/podman.sock socket is mounted so that I can build container images and run containers.
I create a volume for ~/source that survives starts and stops of the container. That’s where I clone all Git
repositories I work on. This volume is backed locally on my laptop and will not survive a loss or theft, but I make sure
to push code changes frequently enough to reduce the impact of such an event.
There’s a volume for ~/.m2/repository so that I don’t have to download the entire world when I build a Maven project
after having restarted the container. There are other additional volumes that fill similar needs.
Security considerations
Don’t put software in your devenv container that you don’t trust
The containerized development environment is not a sandbox where you can securely run any untrusted code. It’s about as secure as running software natively as your user the host. Don’t put software in your devenv container that you don’t trust.
Since the container has access to the X11 server on the host, it can read your screen and listen to your keystrokes. Malicious software could use this to spy on you or record your passwords.
The container shares the host’s network, there’s no firewall between them. The container can open client and server sockets on the host’s IP address and communicate with the Internet just like your host can.
Even though you only install trusted software, that software could include undisclosed vulnerabilities that malicious attackers try to leverage. For that reason it’s important that Podman runs rootless to prevent containers from gaining root access to your host. You wouldn’t run all software on your host as root. Don’t do it in your container either.
The user id and group id used inside the container are mapped to the user that started the devenv container so that they have the same permissions in shared files and sockets. It’s possible to become root inside the container, but that’s just mapped to an ephemeral subordinate UID on the host and cannot be used to gain elevated access. The root user in the container is not a real root user on the host.
Benefits
What have I gained since I went Dev-Env-as-Code?
- When I change laptop I only need to install Git and Podman.
- I can run several conflicting environments in parallel depending on the project I am working on.
- I frequently try out changes that I throw away if they don’t work out. There’s no left over metadata and dotfiles from old uninstalled tools.
- I have full source control versioning of all my settings and software.
Alternatives
Distrobox uses similar functionality but for a slightly different goal. It allows you to run
different Linux distributions on top of any Linux host, but doesn’t give you the same precise and concise control over
your software and settings out of the box (hehe). Distrobox focuses on installing software from a Linux distribution’s
package manager (such as Ubuntu’s APT repositories) which is great when it works but I’ve found that I can’t get all the
software I want that way. Some software is only available from other locations - easy in a Dockerfile’s RUN statement.
And setting up preferences requires you to manipulate contents of individual files - also easy in a RUN statement in a
Dockerfile. I’m sure Distrobox can be made to do those things too, I haven’t tried. For my needs I can achieve what I
want with a simple Dockerfile and a helper script. Sometimes less is more.
Devbox has a rationale almost exactly the same as my devenv project. To me, Devbox seems to be a true implementation of the Dev-Env-as-Code concept. They go about it in a different way than I do, and it’s a much larger codebase, but they have got the idea right.
Try it Out
You can clone my devenv project at GitHub and try it out yourself. This is set up just the way I like it and it would be surprising if it was perfect for you too. That’s not the ambition. Instead, I encourage you to fork the project or use it as a template when you tailor your environment to your needs and wants.
In the end, the tools you use to do your job should be your individual choice. There is no one-size-fits-all. But whatever your preferences are, and whichever technology you use to set them up, you can embrace the Dev-Env-as-Code concept and take control over your tools!